This article is republished from : https://mp.weixin.qq.com/s/rh9t7Wt7DVHL3P7xqwG3HQ by Dmitrii Eliuseev.
Currently, the vast majority of large models run on cloud servers, and end devices get replies by calling api's. However, this approach has several drawbacks: first, cloud api requires the device to be always online, which is unfriendly to some devices that need to run without Internet access; second, cloud api calls consume traffic fees, which users may not want to pay; finally, if after a few years, the project team is shut down and the API interfaces are shut down, the smart hardware that the user has spent a lot of money to buy will become a brick. So, I strongly believe that the final user hardware should be able to run completely offline without extra cost or using online APIs.(Users can choose whether to use online api or not, but offline service is required)
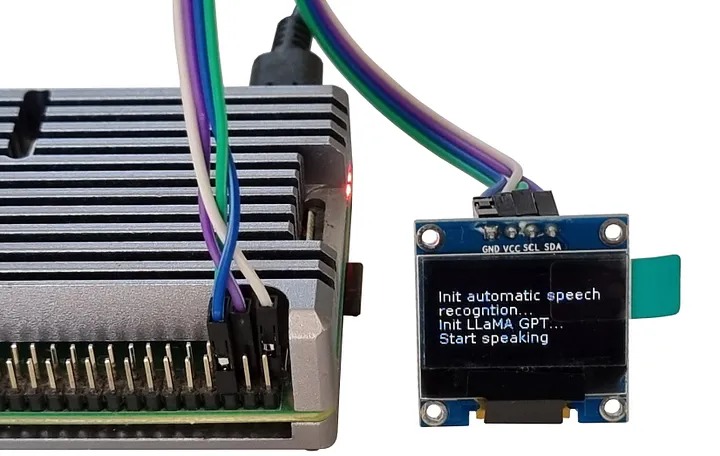
In this article, I will show how to run the LLaMA-2 GPT model and Automatic Speech Recognition (ASR) on a Raspberry Pi. This allows us to ask the Raspberry Pi questions and get answers, all of which will be done completely offline.
The code provided in this paper runs on a Raspberry Pi. But it also works on Windows, OSX or Linux laptops. So those readers who don't have a Raspberry Pi can easily test the code.
Hardware
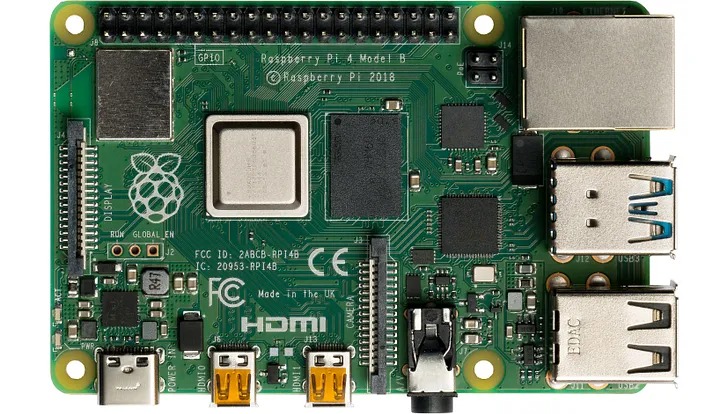
The Raspberry Pi 4, which is a single-board computer running Linux; it is small, requires only 5V DC power, and does not need a fan or active cooling:
For RAM size, we have two options:
- The Raspberry Pi with 8 GB RAM allows us to run the 7B LLaMA-2 GPT [1] model, which has a memory footprint of about 5 GB in 4-bit quantization mode.
- Devices with 2 or 4 GB RAM allow us to run smaller models like the TinyLlama-1B [2]. This model is also faster, but as we will see later, its answers may be a bit less "smart".
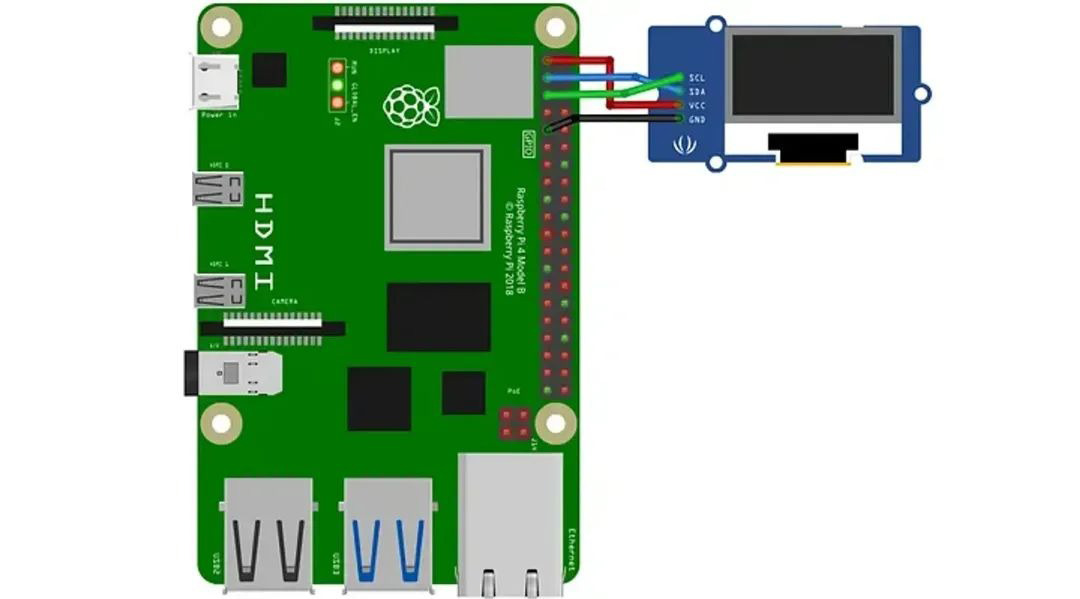
The Raspberry Pi is a full-fledged Linux computer, and we can easily see the output in the terminal via SSH. But it's not interesting enough or suitable for mobile end devices like robots. For the Raspberry Pi, I will use a monochrome 128×64 I2C OLED display. The display requires only 4 wires to connect:

The display can be purchased on Taobao for a dozen or so dollars; no soldering is required, just enable the I2C interface in the Raspberry Pi settings; there are enough tutorials on this. For simplicity's sake, I'll skip the hardware part here and focus on the Python code.
The Display
I'll start with the display, since it's best to see something on the screen during testing; the Adafruit_CircuitPython_SSD1306 library allows us to display any image on an OLED display. The library has a low-level interface; it can only draw pixel or monochrome bitmaps from a memory buffer. To use scrollable text, I created an array that stores the text buffer and a _display_update method that draws the text:
|
1
2
3
4
5
6
7
8
9
10
11
12
13
14
15
16
17
18
19
20
21
22
23
24
25
26
27
28
29
|
from PIL import Image, ImageDraw, ImageFont
try:
import board
import adafruit_ssd1306
i2c = board.I2C()
oled = adafruit_ssd1306.SSD1306_I2C(pixels_size[0], pixels_size[1], i2c)
except ImportError:
oled = None
char_h = 11
rpi_font_poath = "DejaVuSans.ttf"
font = ImageFont.truetype(rpi_font_poath, char_h)
pixels_size = (128, 64)
max_x, max_y = 22, 5
display_lines = [""]
def _display_update():
""" Show lines on the screen """
global oled
image = Image.new("1", pixels_size)
draw = ImageDraw.Draw(image)
for y, line in enumerate(display_lines):
draw.text((0, y*char_h), line, font=font, fill=255, align="left")
if oled:
oled.fill(0)
oled.image(image)
oled.show()
|
Here, a (22, 5) variable contains the number of rows and columns we can display. The variable oled can also be None ImportError if this happens; for example, if we run this code on a laptop instead of a Raspberry Pi. To simulate text scrolling, I also created two helper methods:
|
1
2
3
4
5
6
7
8
9
10
11
12
13
14
15
16
17
|
def add_display_line(text: str):
""" Add new line with scrolling """
global display_lines
# Split line to chunks according to screen width
text_chunks = for i in range(0, len(text), max_x)]
for text in text_chunks:
for line in text.split("\n"):
display_lines.append(line)
display_lines = display_lines[-max_y:]
_display_update()
def add_display_tokens(text: str):
""" Add new tokens with or without extra line break """
global display_lines
last_line = display_lines.pop()
new_line = last_line + text
add_display_line(new_line)
|
The first method is to add a new line to the display; if the string is too long, this method will automatically split it into several lines. The second method is to add text markup without a "carriage return"; I'll use this to display the answer to the GPT model. Call the add_display_line method:
|
1
2
3
|
for p in range(20):
add_display_line(f"{datetime.now().strftime('%H:%M:%S')}: Line-{p}")
time.sleep(0.2)
|
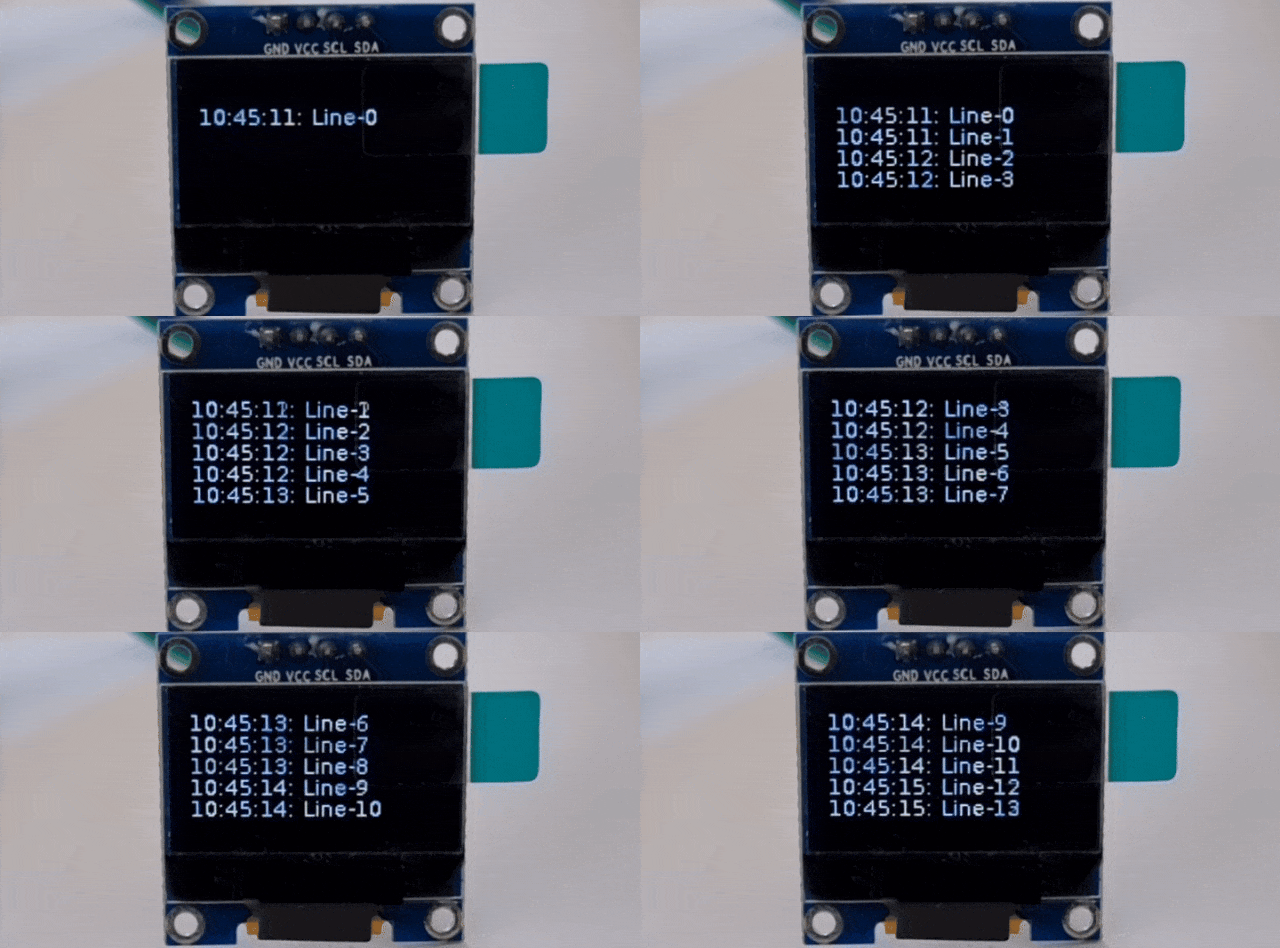
If everything works correctly, the Raspberry Pi will print the current time repeatedly:

Automatic Speech Recognition (ASR)
For ASR, I'll be using HuggingFace's Transformers [3] library, calling it to implement speech recognition with a few lines of Python code:
|
1
2
3
4
5
6
7
|
from transformers import pipeline
from transformers.pipelines.audio_utils import ffmpeg_microphone_live
asr_model_id = "openai/whisper-tiny.en"
transcriber = pipeline("automatic-speech-recognition",
model=asr_model_id,
device="cpu")
|
Here, I used the Whisper-tiny-en [4] model, which was trained on 680,000 hours of speech data. This is the smallest Whisper model; it has a file size of 151 MB. when the model is loaded, we can use this ffmpeg_microphone_live method to fetch data from the microphone:
|
1
2
3
4
5
6
7
8
9
10
11
12
13
14
15
16
|
def transcribe_mic ( chunk_length_s: float ) -> str :
""" Transcribe audio from microphone """
global transcriber
Sample_rate = transcriber.feature_extractor.sampling_rate
mic = ffmpeg_microphone_live(
Sample_rate=sampling_rate,
chunk_length_s=chunk_length_s,
stream_chunk_s=chunk_length_s,
)
result = ""
for item in transcriber(mic):
result = item[ "text" ]
if not item[ "partial" ][ 0 ]:
Break
return result.strip()
|
The Raspberry Pi does not have a microphone, but any USB microphone will do the job. The code can also be tested on a laptop; on a laptop, the built-in microphone will be used.
Language Model
Now, let's add the big language model. First, we need to install the required libraries:
|
1
2
|
pip3 install llama-cpp-python
pip3 install huggingface-hub sentence-transformers langchain
|
Before we can use LLM, we need to download it. As previously discussed, we have two options. For the 8GB Raspberry Pi, we can use the 7B model. For 2GB devices, the 1B tiny LLM is the only viable option; larger models cannot be loaded into RAM.To download the model, we can use this huggingface-cli tool:
|
1
2
3
|
huggingface-cli download TheBloke/Llama-2-7b-Chat-GGUF llama-2-7b-chat.Q4_K_M.gguf --local-dir . --local-dir-use-symlinks False
ORhuggingface-cli download TheBloke/TinyLlama-1.1B-Chat-v1.0-GGUF tinyllama-1.1b-chat-v1.0.Q4_K_M.gguf --local-dir . --local-dir-use-symlinks False
|
I used the Llama-2-7b-Chat-GGUF and TinyLlama-1-1b-Chat-v1-0-GGUF models. The smaller model runs faster, but the larger model may provide better results.
After downloading the model, we can use it:
|
1
2
3
4
5
6
7
8
9
10
11
12
13
14
15
16
17
18
19
20
21
22
23
24
25
26
27
28
29
30
31
32
33
34
35
36
37
38
39
40
41
42
43
44
45
46
|
from langchain.llms import LlamaCpp
from langchain.callbacks.manager import CallbackManager
from langchain.callbacks.streaming_stdout import StreamingStdOutCallbackHandler
from langchain.prompts import PromptTemplate
from langchain.schema.output_parser import StrOutputParser
llm: Optional[LlamaCpp] = None
callback_manager: Any = None
model_file = "tinyllama-1.1b-chat-v1.0.Q4_K_M.gguf" # OR "llama-2-7b-chat.Q4_K_M.gguf"
template_tiny = """<|system|>
You are a smart mini computer named Raspberry Pi.
Write a short but funny answer.</s>
<|user|>
{question}</s>
<|assistant|>"""
template_llama = """<s>[INST] <<SYS>>
You are a smart mini computer named Raspberry Pi.
Write a short but funny answer.</SYS>>
{question} [/INST]"""
template = template_tiny
def llm_init():
""" Load large language model """
global llm, callback_manager
callback_manager = CallbackManager([StreamingCustomCallbackHandler()])
llm = LlamaCpp(
model_path=model_file,
temperature=0.1,
n_gpu_layers=0,
n_batch=256,
callback_manager=callback_manager,
verbose=True,
)
def llm_start(question: str):
""" Ask LLM a question """
global llm, template
prompt = PromptTemplate(template=template, input_variables=["question"])
chain = prompt | llm | StrOutputParser()
chain.invoke({"question": question}, config={})
|
Using the model is easy, but next: we need to stream the answers on an OLED screen. To do this, I'm going to use a custom callback that is executed whenever LLM generates a new token:
|
1
2
3
4
5
6
7
8
9
10
11
12
13
14
15
16
17
|
class StreamingCustomCallbackHandler(StreamingStdOutCallbackHandler):
""" Callback handler for LLM streaming """
def on_llm_start(
self, serialized: Dict[str, Any], prompts: List[str], **kwargs: Any
) -> None:
""" Run when LLM starts running """
print("<LLM Started>")
def on_llm_end(self, response: Any, **kwargs: Any) -> None:
""" Run when LLM ends running """
print("<LLM Ended>")
def on_llm_new_token(self, token: str, **kwargs: Any) -> None:
""" Run on new LLM token. Only available when streaming is enabled """
print(f"{token}", end="")
add_display_tokens(token)
|
Testing
Finally, combine all the parts. The code is simple:
|
1
2
3
4
5
6
7
8
9
10
11
12
13
14
15
16
17
|
if __name__ == "__main__":
add_display_line("Init automatic speech recogntion...")
asr_init()
add_display_line("Init LLaMA GPT...")
llm_init()
while True:
# Q-A loop:
add_display_line("Start speaking")
add_display_line("")
question = transcribe_mic(chunk_length_s=5.0)
if len(question) > 0:
add_display_tokens(f"> {question}")
add_display_line("")
llm_start(question)
|
Here, the Raspberry Pi records audio in 5 seconds, then the speech recognition model converts the audio to text; finally, the recognized text is sent to the LLM. after the end, the process is repeated. This approach could be improved, for example, by using an automatic audio level threshold, but it works well enough for a weekend demo.
After a successful run on the Raspberry Pi, the output is shown below:
Here we can see the 1B LLM inference speed on Raspberry Pi 4. Raspberry Pi 5 should be 30-40% faster.
I have not used any benchmarks (e.g. BLEU or ROUGE) to compare the quality of the 1B and 7B models. Subjectively, the 7B model provides more correct and informative answers, but it also requires more RAM, takes more time to load (file sizes of 4.6 and 0.7GB, respectively), and runs 3-5 times slower. As for power consumption, the Raspberry Pi 4 requires an average of 3-5W with the model running, OLED screen and USB microphone attached.
Conclusion
In this paper, we have run speech recognition and large language models on the Raspberry Pi, enabling the Raspberry Pi to understand our speech and respond. Such demos are also an interesting milestone for GPT modeling at the edge: GPT is entering the era of smart devices that will be able to understand human speech, respond to text commands or perform different actions.
As we can see from the video, LLM is still a bit slow to respond. But according to Moore's law, in 5-10 years the same model will easily run on a $1 chip, just like now we can run the full-fledged PDP-11 emulator (PDP was worth $100,000 back in the 80s) on a $5 ESP32 board.
References
[1]7B LLaMA-2 GPT: https://huggingface.co/TheBloke/Llama-2-7B-Chat-GGUF
[2]TinyLlama-1B: https://huggingface.co/TheBloke/TinyLlama-1.1B-Chat-v1.0-GGUF
[3]Transformers: https://huggingface.co/docs/transformers/main_classes/pipelines
[4]Whisper-tiny-en: https://huggingface.co/openai/whisper-tiny.en
