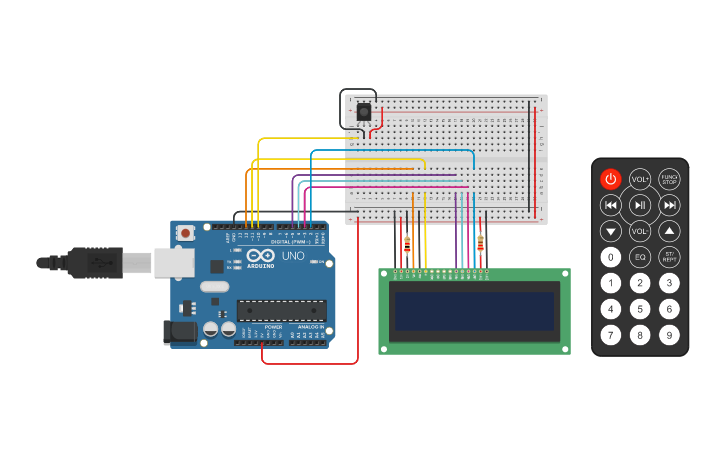
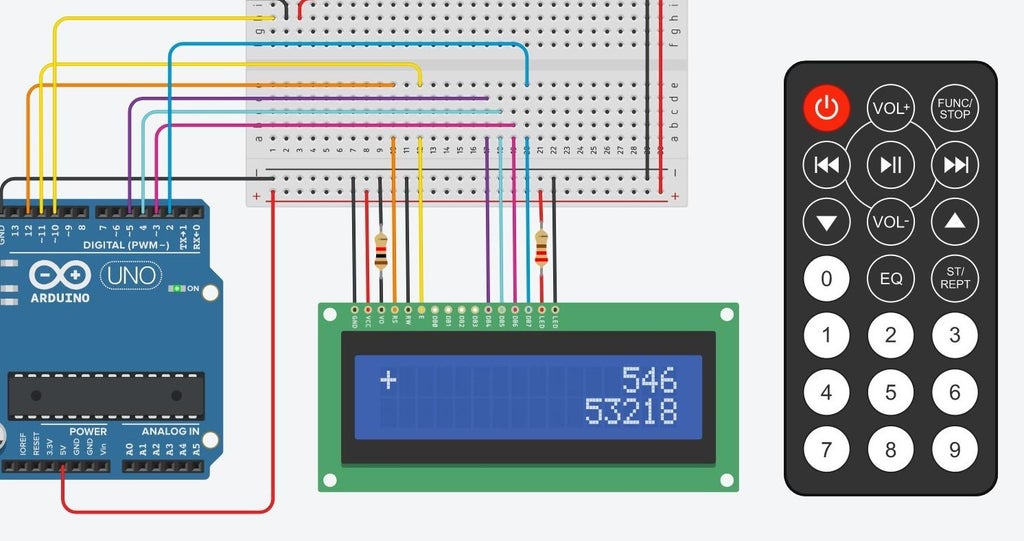
This calculator consists of an LCD1602 screen and an Arduino UNO that allows you to add, subtract, multiply and divide by entering numbers remotely. I know, it doesn't make sense, well I don't have a keyboard, but I do have an infrared remote and receiver, so I figured why shouldn't I use the remote as a keyboard.
This example is a good one for learning about the LCD1602 and remote control drivers.
Required material:
Arduino UNO R3
Arduino UNO R3
LCD1602 liquid crystal screen
Infrared receiver
220 Ohm Resistor
1k ohm resistor 2 pcs
Infrared Remote Control
Arduino library:
IRremote by shirriff, z3t0, ArminJo – v2.5.0
LiquidCrystal by Arduino, Adafruit – v1.0.7
Make sure you are using these packages and have installed the same version, in some future versions some of the functionality of the packages used in this project like IRremote or LiquidCrystal might be deprecated, which might lead to unexpected errors.
Schematic

The connections are listed below
https://github.com/Jaagrav/IRcalculator/
Programming

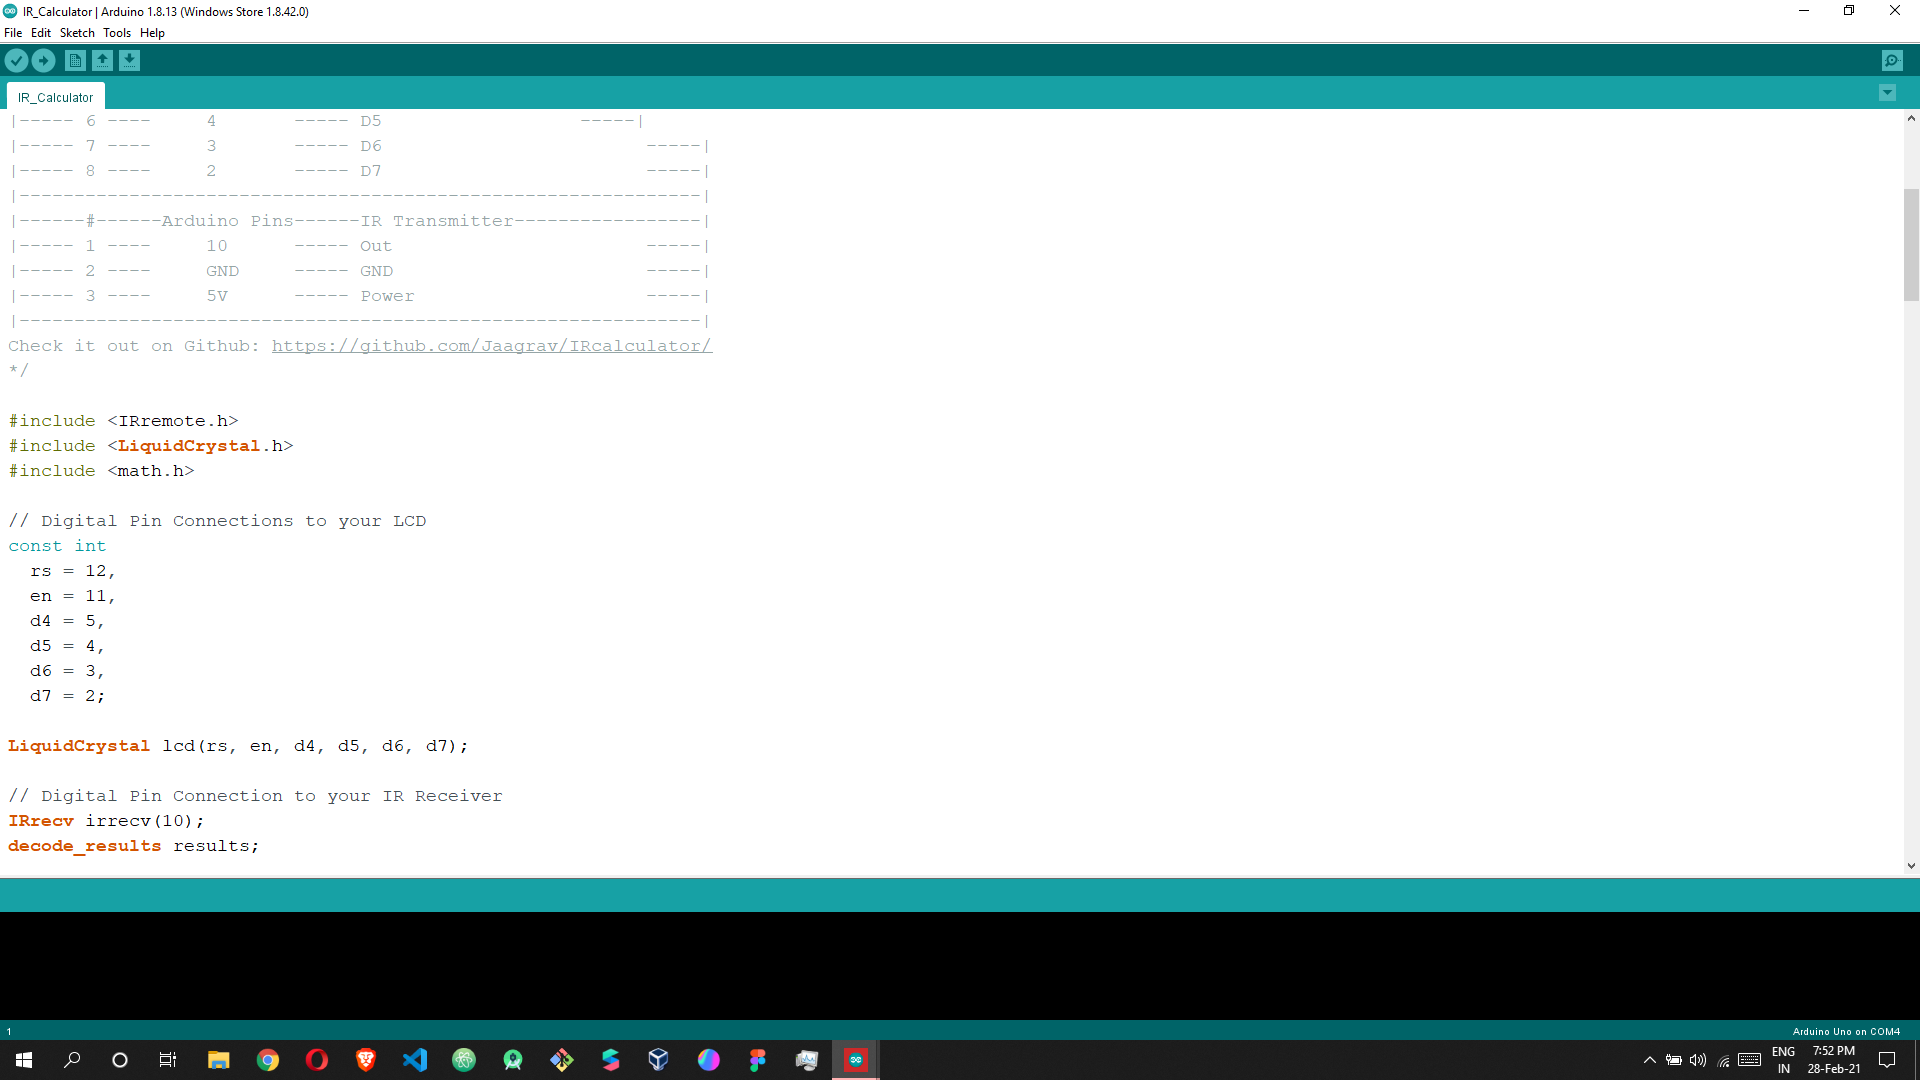
This is the code needed to make the remote calculator work. Simply copy and paste the code into your Arduino IDE, I have now left some comments in the code.
|
1
2
3
4
5
6
7
8
9
10
11
12
13
14
15
16
17
18
19
20
21
22
23
24
25
26
27
28
29
30
31
32
33
34
35
36
37
38
39
40
41
42
43
44
45
46
47
48
49
50
51
52
53
54
55
56
57
58
59
60
61
62
63
64
65
66
67
68
69
70
71
72
73
74
75
76
77
78
79
80
81
82
83
84
85
86
87
88
89
90
91
92
93
94
95
96
97
98
99
100
101
102
103
104
105
106
107
108
109
110
111
112
113
114
115
116
117
118
119
120
121
122
123
124
125
126
127
128
129
130
131
132
133
134
135
136
137
138
139
140
141
142
143
144
145
146
147
148
149
150
151
152
153
154
155
156
157
158
159
160
161
162
163
164
165
166
167
168
169
170
171
172
173
174
175
176
177
178
179
180
181
182
183
184
185
186
187
188
189
190
191
192
193
194
195
196
197
198
199
|
/*This is an IR Remote Controlled Calculator.I have tried to get rid of all the bugs that I have seenin other calculators made using an arduino. This calculatorcan be used like a normal calculator, you can make simultaneous calculations with this, add points, etc.The LCD Display used here is a RG1602A,you may refer to this article to understand how to use the display,https://create.arduino.cc/projecthub/najad/interfacing-lcd1602-with-arduino-764ec4All you need to do is connect the wires in the correspondingpins written down below and edit the IR Codes:|------#------Arduino Pins------LCD RG1602A-------------------||----- 1 ---- GND ----- VSS,V0 (With 2K ohm),RW,K -----||----- 2 ---- 5V ----- VDD, A (With 220 ohm) -----||----- 3 ---- 12 ----- RS -----||----- 4 ---- 11 ----- E -----||----- 5 ---- 5 ----- D4 -----||----- 6 ---- 4 ----- D5 -----||----- 7 ---- 3 ----- D6 -----||----- 8 ---- 2 ----- D7 -----| |-------------------------------------------------------------||------#------Arduino Pins------IR Transmitter----------------||----- 1 ---- 10 ----- Out -----||----- 2 ---- GND ----- GND -----||----- 3 ---- 5V ----- Power -----||-------------------------------------------------------------|Check it out on Github: https://github.com/Jaagrav/IRcalculator/*/#include <IRremote.h>#include <LiquidCrystal.h>#include <math.h>// Digital Pin Connections to your LCDconst int
rs = 12,
en = 11,
d4 = 5,
d5 = 4,
d6 = 3,
d7 = 2;
LiquidCrystal lcd(rs, en, d4, d5, d6, d7);// Digital Pin Connection to your IR ReceiverIRrecv irrecv(10);decode_results results;String number1 = "0",
number2 = "0",
optr = "=",
sixteenString = " ";
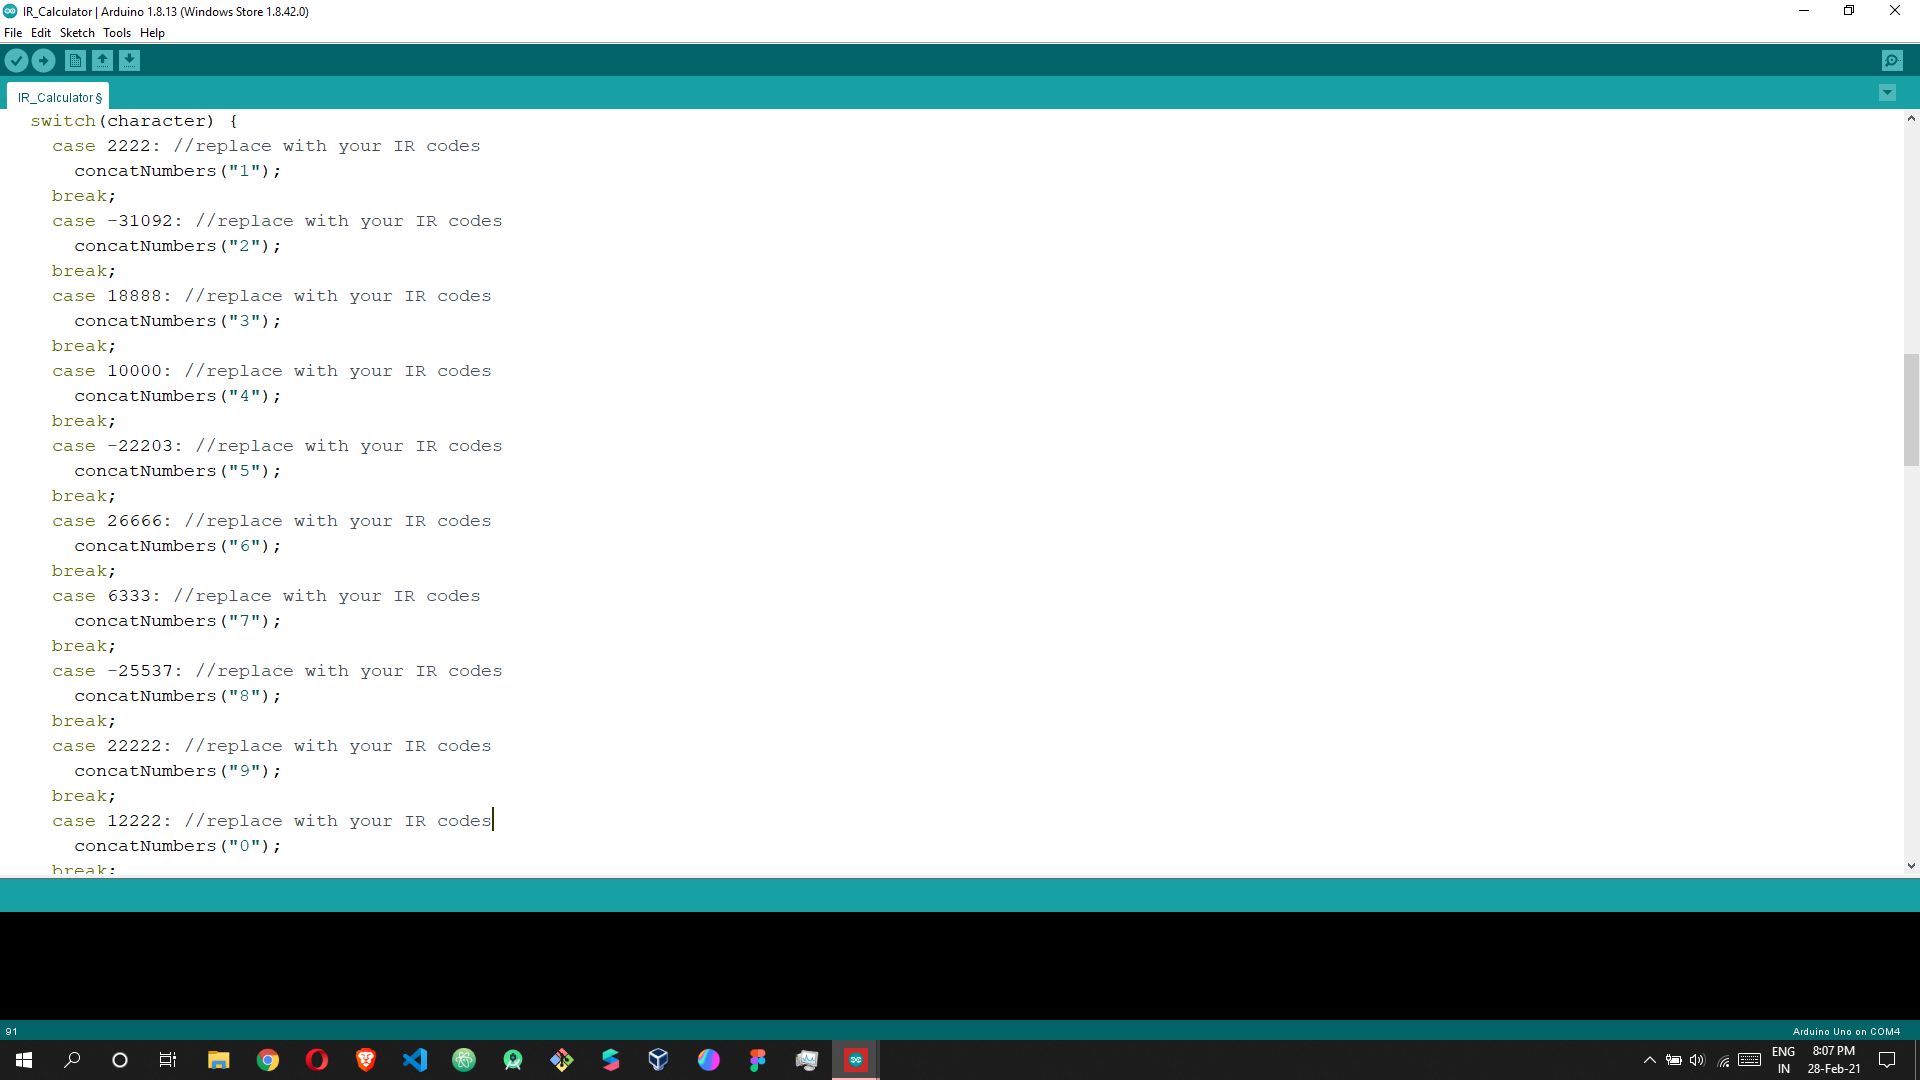
/*In the below switch-case replace the numbers with the IR codesfrom your remote. Make sure you write the code that gets printedin your serial monitor from line 142.*/void acceptInput(int character) {
Serial.println(character);
switch(character) {
case 2222:
concatNumbers("1");
break;
case -31092:
concatNumbers("2");
break;
case 18888:
concatNumbers("3");
break;
case 10000:
concatNumbers("4");
break;
case -22203:
concatNumbers("5");
break;
case 26666:
concatNumbers("6");
break;
case 6333:
concatNumbers("7");
break;
case -25537:
concatNumbers("8");
break;
case 22222:
concatNumbers("9");
break;
case 12222:
concatNumbers("0");
break;
case 28888:
concatNumbers(".");
break;
case 255:
number1 = "0";
number2 = "0";
optr = "=";
break;
case 32222:
function("+");
break;
case -28870:
function("-");
break;
case 24444:
function("/");
break;
case 8444:
function("x");
break;
case 45555:
if(optr != "=")
calculate("=");
break;
case 4333:
backSpace();
break;
default:
Serial.println("Invalid Input");
}
}void setup() {
Serial.begin(9600);
lcd.begin(16, 2);
irrecv.enableIRIn();
}void loop() {
if (irrecv.decode(&results)) {
unsigned int result = results.value;
String val = String(result);
acceptInput(val.toInt());
irrecv.resume();
}
lcd.setCursor(0,0);
lcd.print(optr + " " + sixteenString.substring(number1.length() + 3) + number1);
lcd.setCursor(0,1);
lcd.print(sixteenString.substring(number2.length()) + number2);
}void calculate(String op) {
double no1 = number1.toDouble();
double no2 = number2.toDouble();
double calcVal = 0.0;
if(optr == "+")
calcVal = (no1 + no2);
else if(optr == "-")
calcVal = (no1 - no2);
else if(optr == "x")
calcVal = (no1 * no2);
else if(optr == "/")
calcVal = (no1 / no2);
number1 = toString(calcVal);
number2 = "0";
optr = op;
}String toString(double num) {
return String(num);
}void function(String e) {
if(number1 != "0" && number2 != "0") {
calculate(e);
}
else if(number1 == "0") {
number1 = number2;
number2 = "0";
}
optr = e;
}void concatNumbers(String num) {
if(optr == "=")
number1 = "0";
if(num != "."){
if(number2.length() == 1 && number2 == "0")
number2 = num;
else
number2 += num;
}
else {
if(number2.charAt(number2.length()-1) != '.' && number2.indexOf('.') == -1)
number2 += num;
}
}void backSpace() {
number2 = number2.substring(0, number2.length() - 1);
if(number2 == "")
number2 = "0";
} |
IR-Calculator.ino Download

Open the Arduino IDE's serial port monitor (CTRL + SHIFT + M). After uploading the code to the Arduino, press certain buttons with the remote control pointed at the IR receiver head. You can observe that the serial monitor will show numbers.
If you need to redefine the relationship between buttons and functions on your remote control, then modify the code above.

